Good morning my lovelies~ It has been a while I know... sorry to say that I let the puff pastry get the better of me! I'm not ashamed to say that puff really is a workout to say the least, plus eating copious amounts of it tends to make one slow and lazy- yes, all the above is said from first hand experience.
I am glad that we have ended puff and moved on to Viennoiserie- Breads and danishes in a nutshell. Oh so delicious breeeaaaddd. Argh. My true weakness. Can't stop eating the Orange Cinnamon Swirl Bread sitting on the counter... Or the Sticky Pecan-Cinnamon Rolls in the fridge...
Ok without much further delay, here come the pictures.
Apple Dartois- Apple compote with a lattice top~ So yummy.
I cooked the apples in some melted butter, caramel and finished them off with a quick flambe~
Now for the assembly, egg wash really makes the puff pastry sticky! The lattice is made with a lattice cutter, but it can be done by hand with staggered 1 inch long slits.
Place the lattice on top of the apples and crimp the edges with a fork. Decorate with little leaves of puff, be sure to score deeply enough so the etches remain after baking~

After a final egg wash and a good long bake in the oven, here's the final product! So preeetttyy~~~ Couldn't bear to cut into it! But yet I did the moment I got home... Yummilicious.
The Pithivier
A base, with a centre of almond cream mixed with pastry cream, covered to create a dome in the middle
Scalloped edges are made with the edges of a piping tip
Then cut out nicely with a paring knife
The scalloped edges are then thumbed down to suppress the rise and a steam hole is poked in the middle of the dome. The entire Pithivier is then brushed with a light coating of egg wash
We're not done yet! The scalloped edges are scored with cross thatch markings
And final scores are done to the dome, radiating out
A good bake in the oven and at 90% done, it is taken out and given a good brush of light corn syrup to create a beautiful glaze. So yummy. Something about the addition of that little bit of pastry cream just takes the edge off the marzipan flavour in the almond cream that I'm not a huge fan of.
The Jalousie- Apparently this is also known as Venetian Blinds cos of the slits that are reminiscent of the blinds
Puff pastry is egg washed at the edges and piped with alternating layers of almond cream and raspberry jam
Piped to form a pyramid so there is some height and volume after baking
Slits are cut into the upper portion of the dough by folding it in half and cutting down avoiding cutting all the way through the spine. It is then sealed around the edges with a fork and trimmed
The final product~ Not my favourite, but it is pretty to look at~ Think by then I was just so tired of eating puff pastry~~~

Another speedy puff case~
This here, is a 5"x5" square of puff pastry rolled to 3/8" thick
Fold it in half with a little flour so that the insides don't stick to themselves, cut slits about 1/2" away from the edge and leaving the corner uncut.
Open back up and you should see this design in the dough
Egg wash the edges of the inner square, be careful not to get egg wash on the sides as it will impede rise!
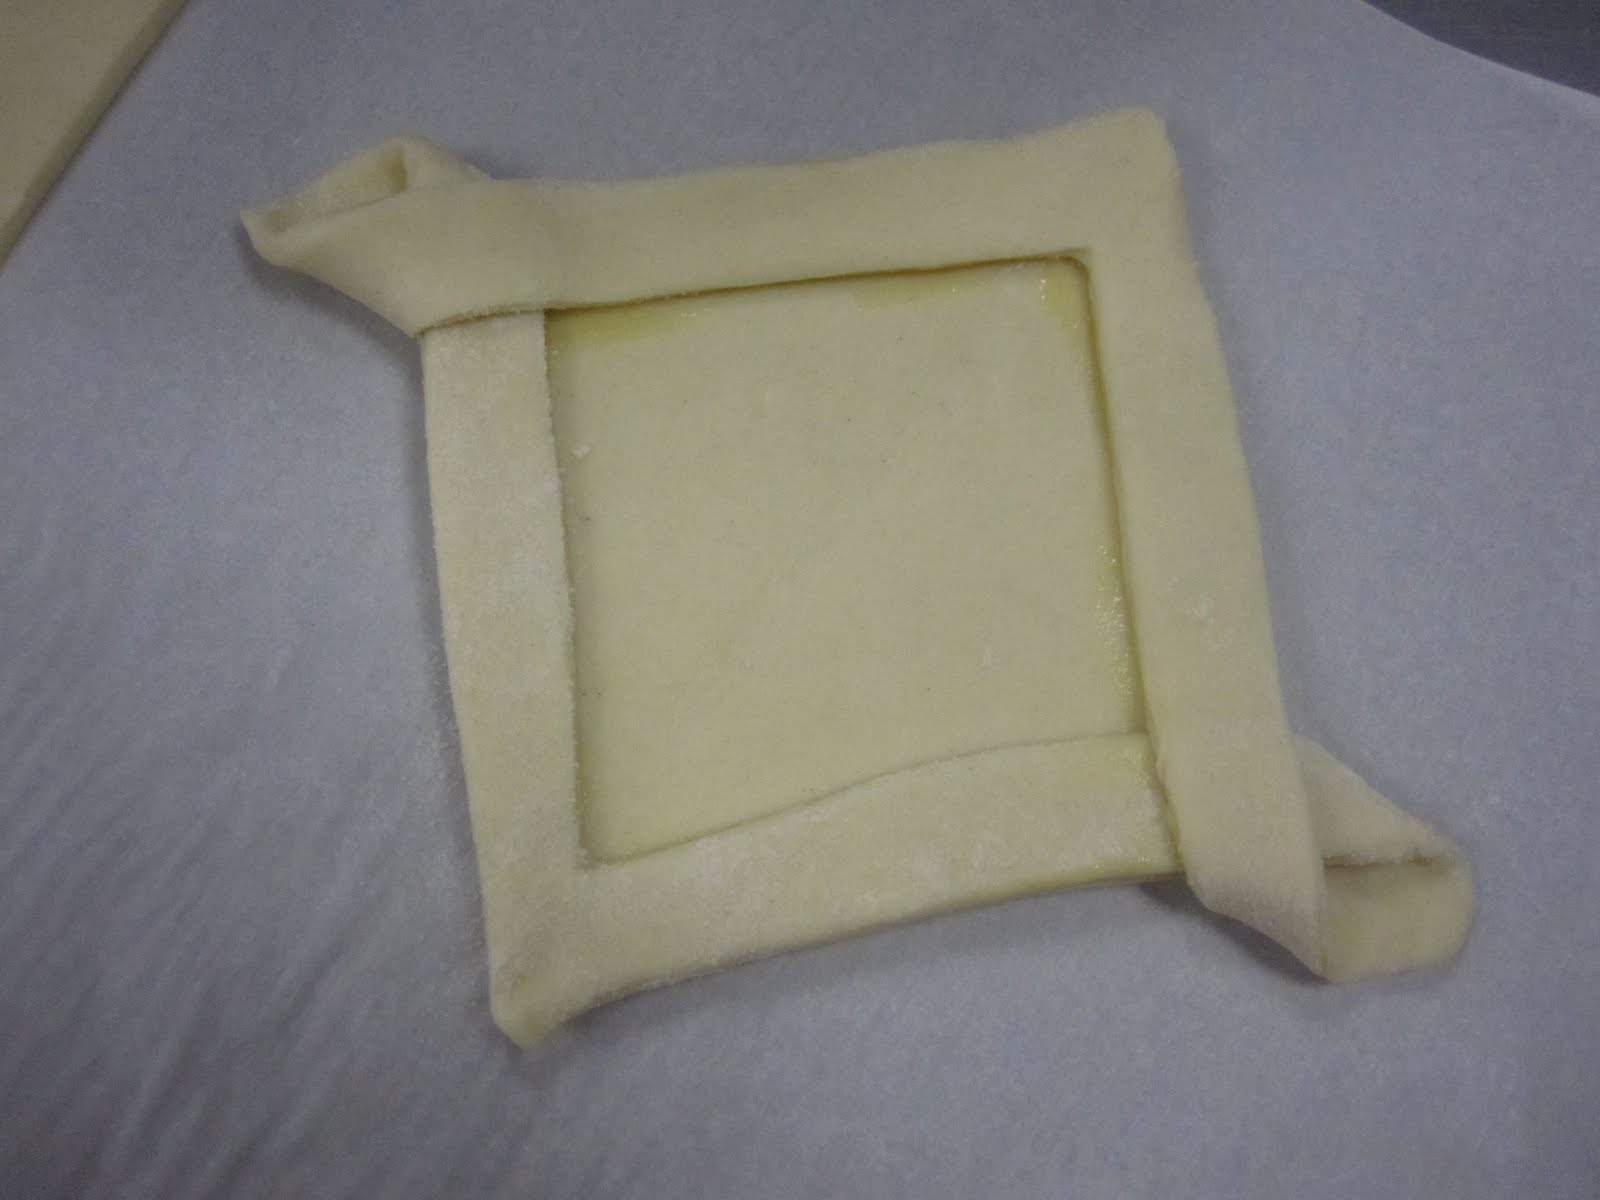
Fold one of the flaps onto opposite egg washed side of the inner square like so~ Brush off the excess flour as you work
Fold over the other flap and egg wash the tops of surfaces. Be sure to dock the bottom so that it will not puff up too, this is will create an area for the filling when the sides rise around it
Viola! A case of puff that can be used during dinners to look all posh~ But only took seconds to make!
The Chocolate Napoleon
Make a chocolate puff pastry dough, flavouring the beurrage of inverse puff pastry with cocoa powder~
Roll it out to 1/8" thick and large enough to cut out 3 strips of the same size for the size of Napoleon of your choice. Remember to dock very well and bake between 2 sheet pans to suppress the rise of the dough
When the pastry is 90% done, take it out of the oven and give it a good brushing of heated light corn syrup and put back into the oven to bake until bubbles stop forming. This gives a beautiful glaze to puff pastry and creates a good moisture barrier for the layers between the Napoleon to keep the cream filling from making the layers soggy!
When the pastry is still hot, cut out the 3 strips of pastry carefully and set aside the flattest one for the top of the Napoleon
Get all your glaze ingredients ready! In this case, we have ganache, and melted white chocolate in a little paper cone
Pour over the ganache and using a large off set spatula, give the surface a good swipe. You only get one try! The very quickly make lines using the white chocolate and draw through the chocolate using the back of a paring knife going from edge to edge, alternating the direction of each line drawn to create the pattern seen above.
For the final assembly, place one of the layers glazed side up on a piece of cardboard. Secure it down with a little of the chocolate filling. Our filling is a Creme d'Or stabilised with 3 sheets of gelatin. Pipe even rows of cream on the first layer and place another layer of pastry glazed side up. Fill with another layer of chocolate cream of the same thickness as the layer below and top with the glazed top of the Napoleon. Chill in the fridge! This Napoleon was so decadent and rich. Also my favourite of the Napoleons cos of the chocolate!
Tip of the Day!
When working with puff pastry, always make sure that the consistency of the beurrage and detrempe is of similar consistency to make for easier and even rolling! This is another tip to make the puff rise more evenly and have beautiful layers later~
xoxo