Thursday, June 9, 2011

Puff Pastry ^^

Hello my sweets... Time has absolutely flown by this week. I'm not gonna lie, its been a trying 2 weeks to say the least, but I'm not going to let it get to me. Ready for a long update? Ok so as my heading indicates, this week has been all about the puff pastry... I have never thought of trying to make my own due to all the hassle of the butter and the rolling but I have to say, we have made a the classic puff pastry as well as the inverse and a quick version and so far they have been pretty good and plenty yummy. Its worth giving it a try, there is no greater satisfaction than seeing that baby rise!

Puff Pastry 101: I could get technical here but I won't. In short, puff pastry gets its layers from layers of butter between layers of dough. In the oven as it bakes, the butter melts, gives off steam, and causes the dough to puff up and rise. In so doing, the layers of dough gets crispy and depending on how many turns were made to the dough, the dough will rise accordingly. Basically, the more turns, the more layers, the higher the rise.

 Quick Puff Pastry

Tip: Note the 4 indentations in the dough? They are there to indicate the number of turns that have been made to that parcel of dough, which by the way is known as a paton.

 
 This is called a double/book turn

 This is the completed double/book turn. Turns are usually done in sets of 2. For the quick puff, we call it quick as we only do 2 sets of double/book turns. As such, the rise may not be as high as the classic puff, but you will get significant puffing as the classic may have 2 more turns, but they are single turns. Confused yet? Don't be. Follow on to get a better idea on the various types of puff pastry

Classic puff pastry. 
The pounding of the butter is to soften it, but it must still be cold. The softened but pounded cold butter is then encased in the dough portion of the process and rolled out. For the classic puff, we do 3 sets of 2 single/letter turns.
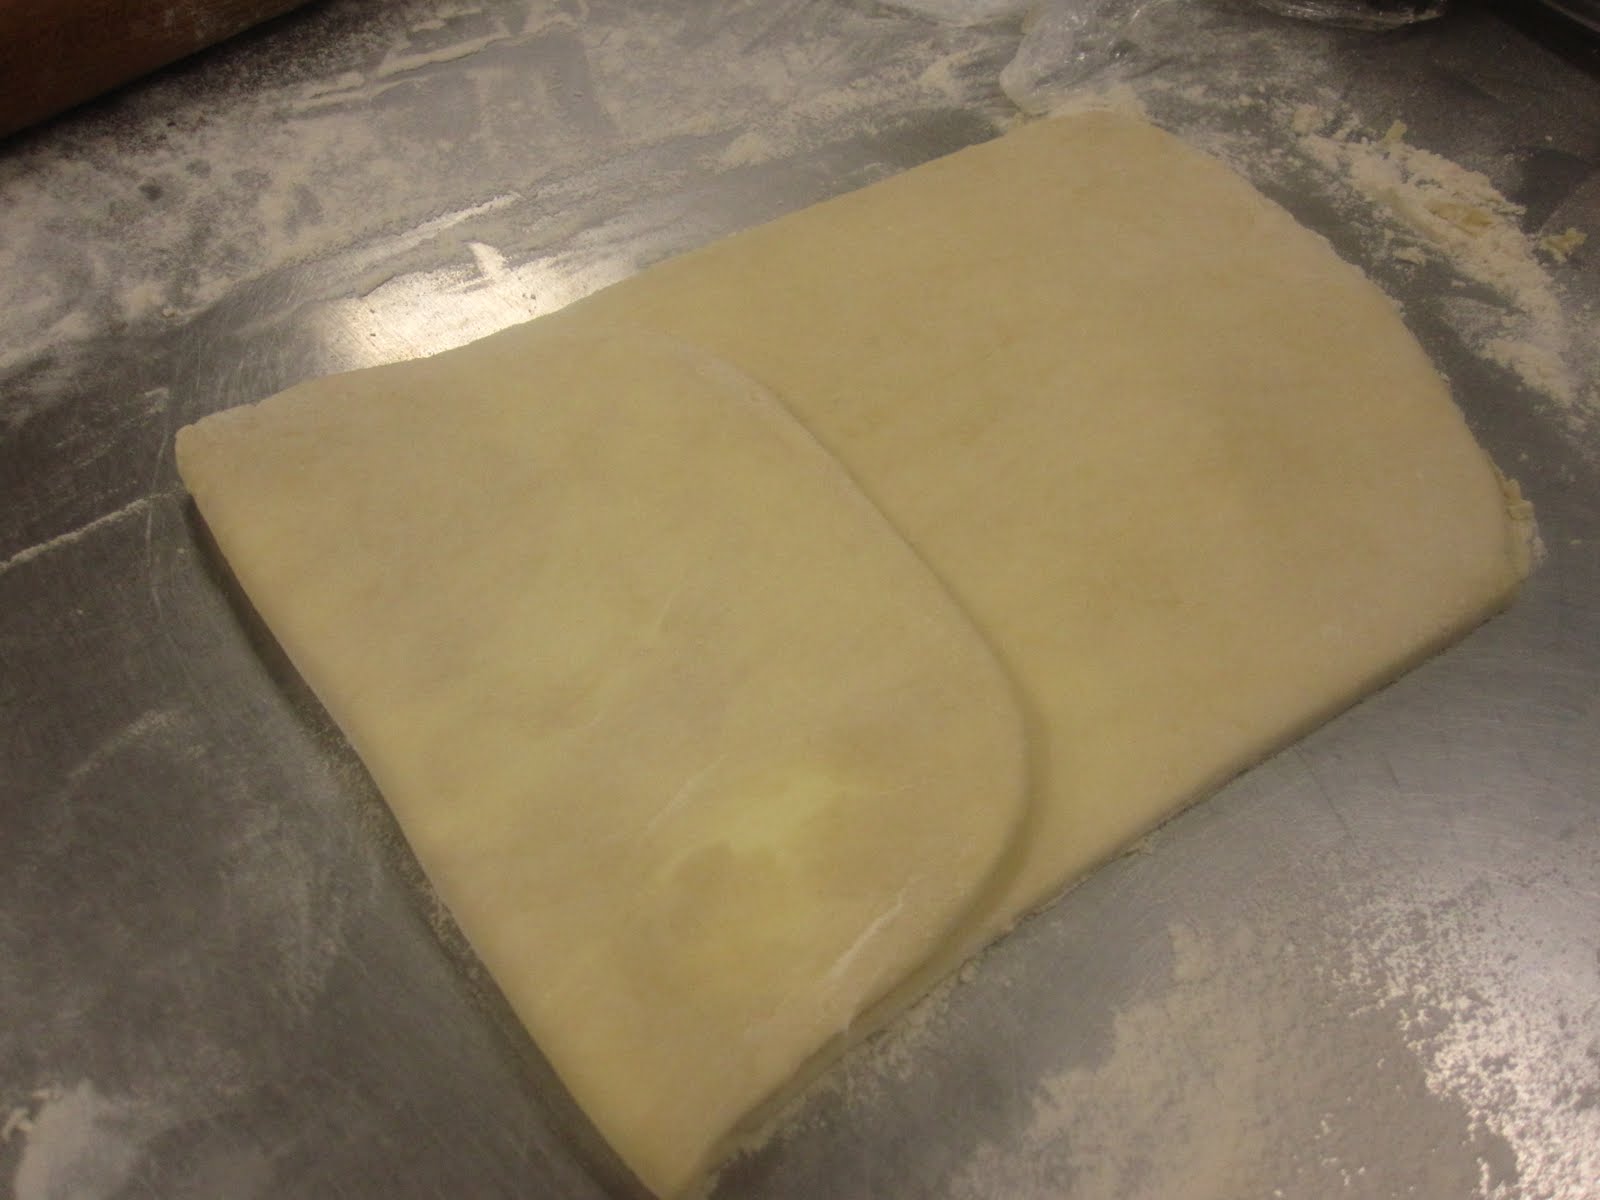
 Here we have the single/letter turn of the classic puff pastry. Letter, as it is folded in 1/3 like how a letter would be folded to fit into a long envelope. You want to see the schmears of butter within the dough. I know it looks strange but trust me, making of the dough is even stranger texturally! Too bad I didn't sneak any pics of those stages as usually my hands are covered in butter. I will try to do so tomorrow.

 I somehow don't have images for the Inverse puff pastry! But not to worry, its primarily the same process as the classic in terms of turns. Only difference is, the butter portion of the puff is on the outside and encases the dough portion within to be rolled. This prevents the overworking of the dough, reducing the amount of gluten formed, which gives a tender dough.

Things that you can do with puff pastry:

 Roll out and sandwich with grated cheese seasoned with paprika and cayenne for a great snack.

 Best with beer. Or so I've heard... *winks*

 Apple tartlets- Very simple and very yummy, simply cut out a disc of puff pastry (pate feuilletee) and lay on slices of thinly sliced apple. We used golden delicious but a granny smith apple should work too. 

 Be generous with the apple slices as they do shrink in the oven as their moisture escapes. We buttered and baked these sprinkled with some vanilla sugar. So good. See how the edge is left uncovered and there is a little puff action going on? So fun to munch on!

 Puff pastry can also be blind baked and made into a strip tart. Here we assembled the puff pastry in the above shape, baked it in the oven with a piece of parchment paper on top as a weight, and voila~ So pretty~~~
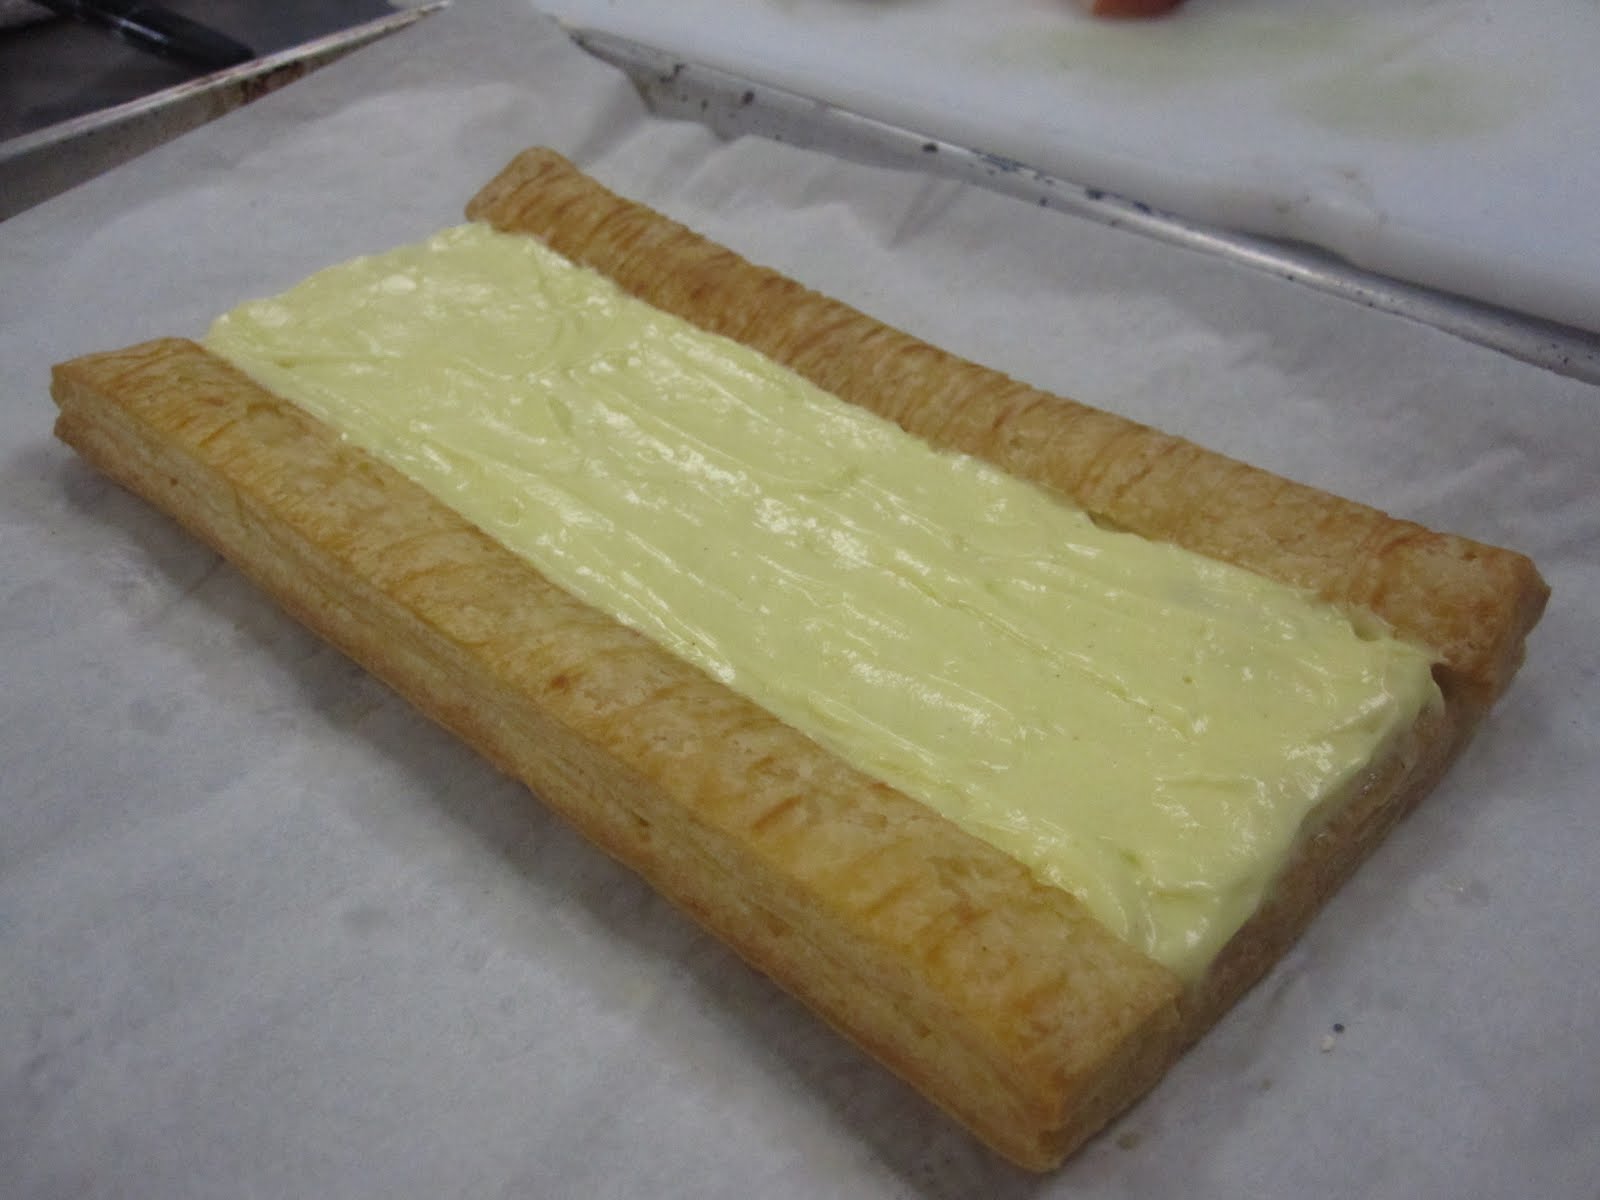
 It is then filled with a lightened pastry cream

 Finally, decorate with fruits of choice and a little dusting of powdered sugar on the sides 
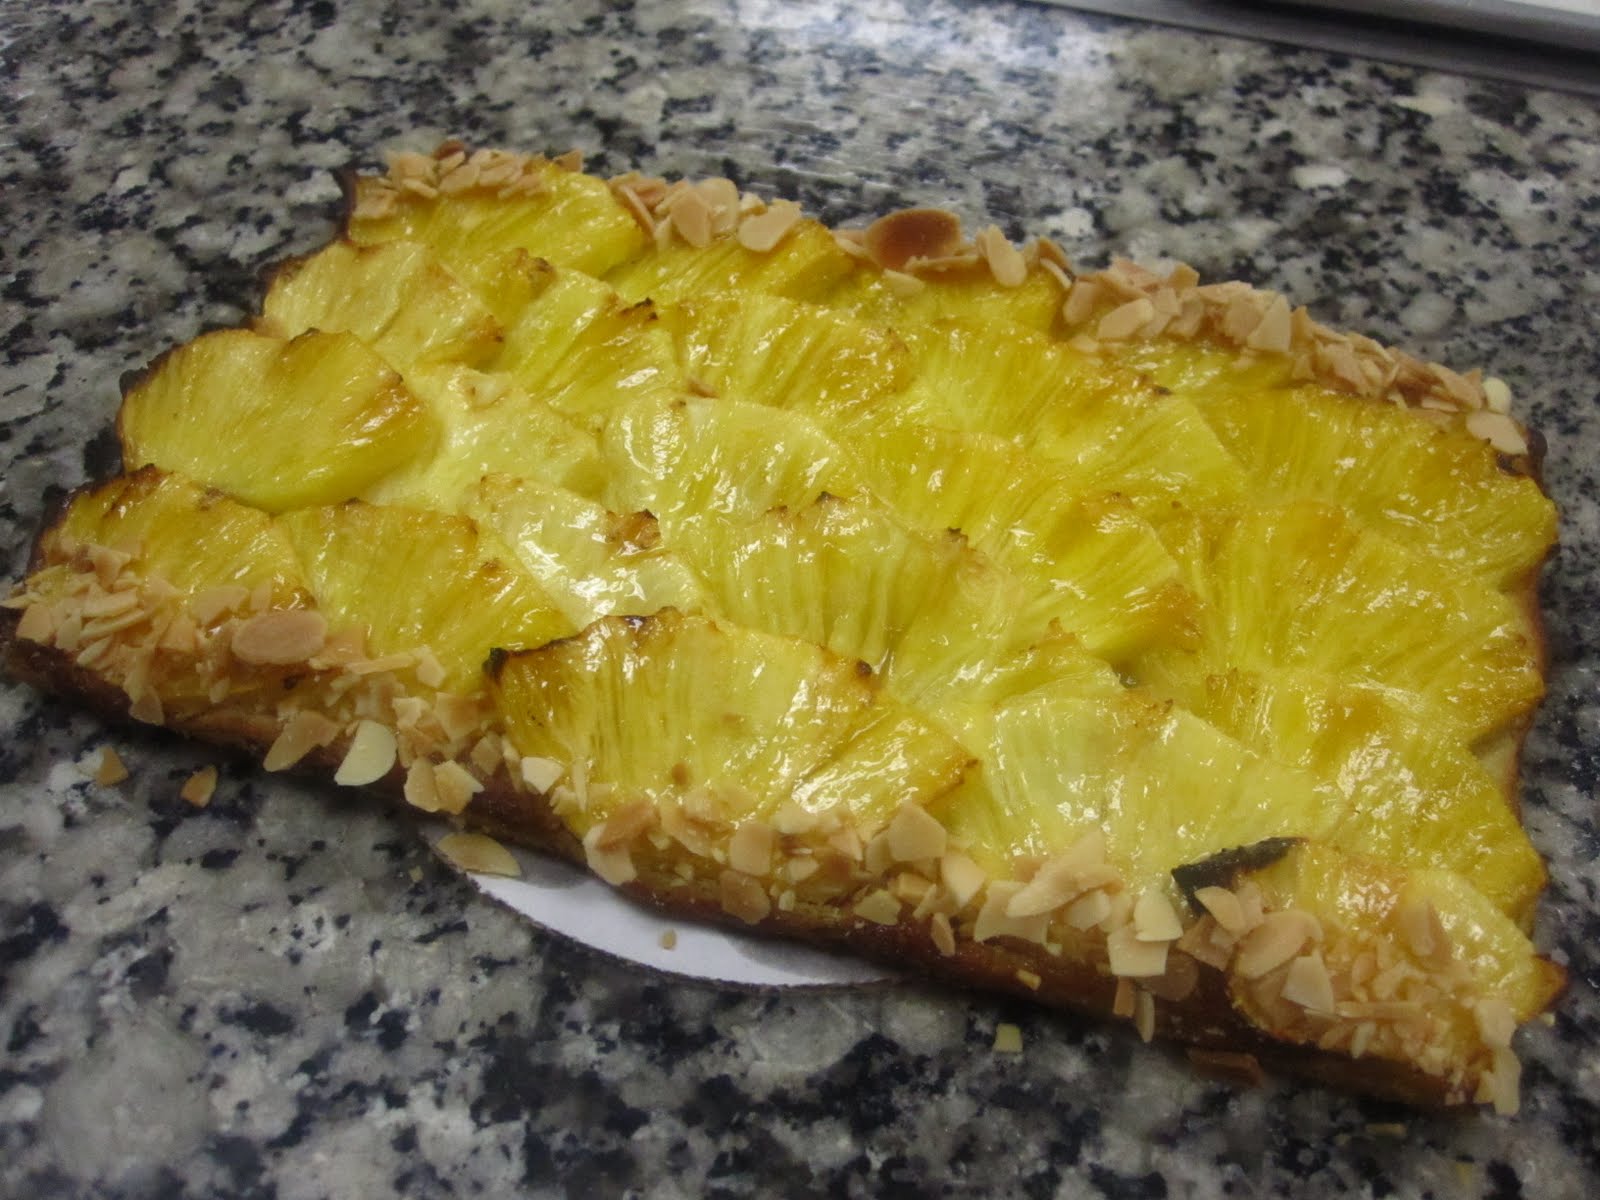
You can also skip the sides and just pile on seasonal fruit, and bake in the oven as is. Once out glaze with apricot jam and sprinkle on some almonds
 
 Another quick and yummy snack are Palmiers (palm leaves). These little morsels are simply made by rolling a sheet of puff pastry in sugar, making sure the sugar gets liberally incorporated into the dough, then rolling the sheet of dough up evenly, chill, slice, bake.

 Half way through baking, be sure to flip them over to the other side gets an equal chance to caramelise nicely.

 I've gotta work on the rolling to eliminate that gap in the dough you see there, but there's something about butter, flour and sugar that never seems to go wrong.

You can also make little cases to fill with anything you desire, sweet or savoury~

Check out the rise on these! So pleased!

Simple but oh so good. Filled with sweetened whipped cream and berries

Topped with a blueberry compote

Tip: You can keep the little cut out and bake it, it makes for a cute little lid for whatever you choose to fill the case with

You can also make a Napoleon. Roll out a sheet of puff pastry, dock very well and bake between 2 sheet trays so it stays flat. Brush with corn syrup right before its done baking and continue till the bubbles stop forming 

Using a template, cut out rounds in the baked pastry and set aside the flattest one for the top

Crush up the scraps of puff to make crumbs

Pipe pastry cream lightened with whipped cream and strengthened by gelatin to the base and middle layers ensuring that each layer of cream is even in height. Using an offset spatula, even out the sides 

Now for the fun bit! Heat a metal skewer till its red hot
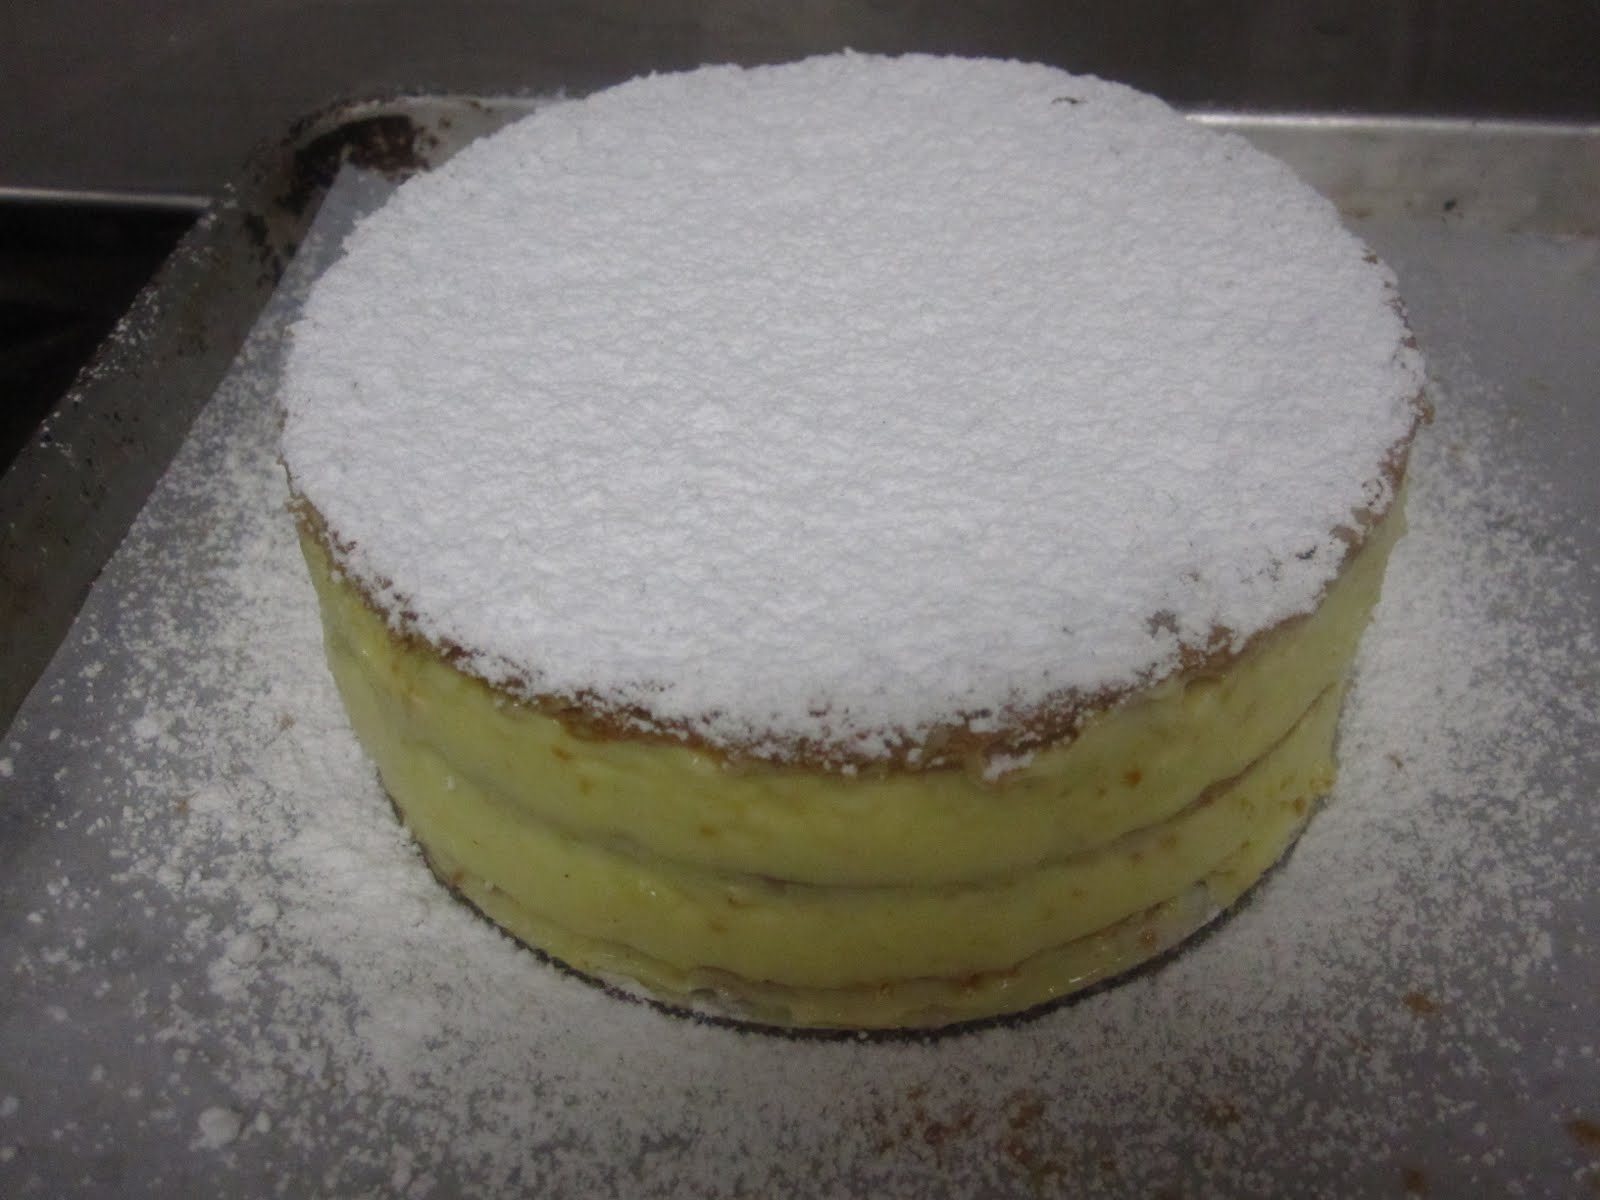
Dust the top of the Napoleon with a good layer of powdered sugar

Now we brand the top with the hot poker! Oh yes. Be very careful doing this though, and note- be in a well ventilated area as this procedure will produce some smoke

Create a cross thatch design

Finally, using the crumbs created earlier from the scraps, decorate the edges of the Napoleon

Tip of the Day!
1. When making puff pastry, always make sure your butter is cold cold cold!
2. Make sure your rolling surface is also cold, as well as heavily floured
3. However, be sure to dust off flour between folds!
4. Fold evenly to ensure that layers created are even. This will enable even rising

Thursday, June 2, 2011

Gateau St. Honore and Gougeres

Hi my little cheese puffs~ I'm glad to see the blog is picking up traction! Thank you to all who have been following so far, the more the merrier, so do spread the word and have people visit the ol' blog :)

For today we made a very yummy Gateau St. Honore (patron saint of baking and pastry chefs) and then made a savoury cheese puff called a Gougere which we made with Gruyere cheese, a little paprika and a dash of cayenne pepper. Can't. Stop. Eating. Them.

 So yummy. The Gateau St. Honore

 
 First, we piped 2 rings and a puff on top of a brisee pastry base which was docked for even baking

 I scored the rings with a fork after brushing them with egg wash to promote an even rise and prevent cracking of the choux ;)

 
 Next step, pipe and bake little choux :) You will need roughly about 15 profiteroles for this...
Tip: Make a little extra. These are sooo yummy to eat once filled and dipped in caramel.

 
 To fill them, once out of the oven, use a fine piping tip to poke holes in the base of the choux
 and pipe in cream of choice. Either Creme Chantilly (sweetened whipped cream) or Creme Patissiere (pastry cream). Today, we used a Creme Patisserie that has the addition of gelatin to help it set up nicely, and lightened with an Italian meringue.

 
 We dip the choux very carefully in caramel, just enough to coat the tops, too much will break your teeth when you bite into them!

 Voila! Puff with a crunchy hat :) Soooo yummy. Texturally its a wonderful playhouse of all things fun and delicious when popped whole and enjoyed.

 Final step, glue the choux onto the outer ring of the gateau with caramel and pipe the same cream used for the filling of the choux within the centre of the gateau. Traditionally, the cream is piped with a V tip to resemble a shell. I didn't have access to such a tip, so I improvised. Pretty no? Have I mentioned that it was delicious yet?

When you cut into the Gateau, you will find the most interesting design from the rings of choux that are hollow within, contrasted by the extremely light yet silky pastry cream. Lastly, you get to enjoy that little choux with the crunch of caramel. Fun to look at, even more fun to eat. Don't get me wrong, its a pain in the ass to make, but if you have lots of time on your hands, totally go for it.

 With the remaining pate a choux, we then proceeded to make the Gougeres. The dough was mixed with grated Gruyere cheese tossed with some Cayenne and Paprika. More of the cheese mix along with some sea salt was then sprinkled on top once the choux was piped and egg washed.

 Holy cheese balls these were good.

 So addictive.

Crunchy on the outside, once bitten into, the puff collapses and turns into cheesy chewy goodness. Oh my. *fans self*
Speaking about fans, we had a power outage in school yesterday which carried on to today. So we made all these in a very warm kitchen... very warm indeed... esp with all the hot caramel, vigorous whisking of pastry cream over hot stoves plus the stirring of the choux over a hot stove too. Oh yes there are also the 4 very hot ovens preheated to 500 degrees. Man. We needed plenty of hydration to keep going today, but I'm choosing to think of it as a sauna of sorts to burn off the calories from eating the choux so its all good~~~

Tip of the Day!
When working with caramel, wear gloves! The best way to prevent yourself from getting a nasty blister or burn from the caramel is to remove the sugar. Therefore,  gloves will make it easier to remove if you happen to get in contact with the molten sugar.


Wednesday, June 1, 2011

Paris-Brest, Swans and Profiteroles

Helloooo my lovelies, I'm being good and updating on time as you can all see... Today we had another day playing with all things pate a choux. First we made Paris-Brest which is a traditional french pastry, a ring of choux filled with cream and made to resemble a bicycle wheel. It was created to honour the famous bicycle race from Paris to Brest, thus the name~

Next, we made profiteroles which are little puffs filled with ice cream :) a puff ice-cream sandwich if you must. Followed by Cygnes or swans.

 The Paris-Brest- choux covered with almonds and baked then filled with praline mousseline

 Piping of the choux dough in rings

 A little egg wash and they are sprinkled with almonds

 Once out of the oven and cooled, the ring is sliced in half horizontally

 Paris-Brest cream is then piped in a pattern all around

The Finale

 Cute lil puff~

 Cut them in half, fill them with freshly churned creme anglaise, drip over molten chocolate and dig in. I know, they were so innocent a moment ago.

 Moving on to swans...

 We pipe out our swan bodies by creating large teardrop choux and piped heads and necks 

 
 Once baked, we cute the choux in half, top half in half again and assembled~

 Within, we filled with pastry cream on the bottom followed by pineapples with lime zest and topped off with creme chantilly

Cute huh?

Tip of the Day!
When piping choux, always try to minimise the tail on top of the choux. If however, you find yourself with the little tails, simply make an egg wash and brush the tails down. Also, scoring the choux with a fork will help for a more even rise all round. Try it!